How to Choose the Right Excavator Bucket?
Choosing the right Excavator Bucket affects digging speed, machine balance, fuel use, and wear. A bucket that looks suitable in a yard may struggle in dense clay or leave excess material behind on a rocky site. The right choice depends on the work, not just the excavator’s size.
Start with the material and task. General-purpose buckets suit many soil conditions, while heavier-duty designs may better handle abrasive ground or broken rock. Trenching, grading, and loading also call for different bucket shapes and cutting edges. Check the bucket’s width, capacity, pin dimensions, and coupler compatibility against the excavator’s specifications. An oversized bucket can strain the machine; one that is too small may slow production. Small details matter.
Tooth style and maintenance deserve attention too. Replaceable teeth can help with penetration, but the best setup depends on the ground and the finish required. Inspect wear points, side cutters, welds, and the cutting edge before purchase or installation. Ask the equipment dealer or manufacturer to confirm fit and operating limits, especially when using a quick coupler. The choice is not always obvious. Job conditions change, and a bucket that works well in damp soil may perform poorly in compacted gravel. Comparing expected use, machine capacity, and service needs gives you a more dependable starting point. There is no perfect bucket for every job; sometimes the best decision still needs a field test.
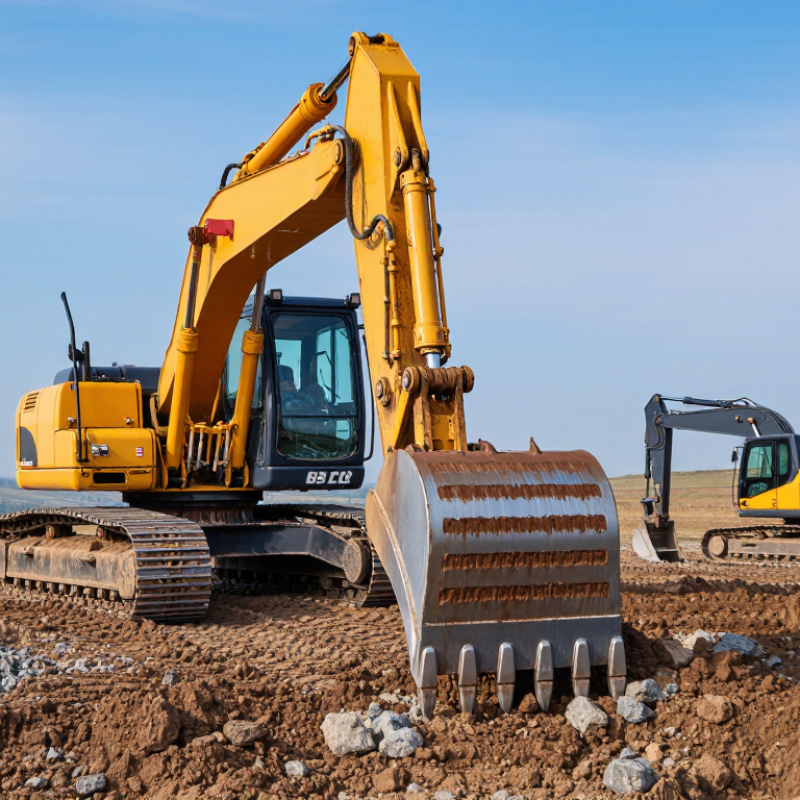
Identify Excavator Class, Operating Weight, and Hydraulic Limits
Choose a bucket by matching it to the excavator’s class and actual operating weight, not by appearance alone. A compact excavator may accept a bucket that physically fits but cannot safely carry its added weight. Check the machine’s operating manual and lift chart, especially for loads held at full reach. Bucket weight, material density, and digging conditions all affect stability. A class label is only a starting point, not a fit guarantee.
Hydraulic limits matter too. Confirm the attachment’s required pressure and flow against the excavator’s specifications, and check whether it needs a dedicated auxiliary circuit. Also verify pin diameter, pin spacing, and coupler compatibility before ordering. A mismatch can cause poor fit or reduce safe operation. Do not assume that more hydraulic force is always better; the machine’s rated limits still apply. These details are easy to overlook when a bucket looks right.
Tips: Compare the bucket’s weight with the machine’s lift chart, then confirm hydraulic and pin specifications in the manuals. If a measurement is uncertain, pause and verify it. A quick check beats an expensive mismatch.
How to Choose the Right Excavator Bucket? - Identify Excavator Class, Operating Weight, and Hydraulic Limits
| Excavator class | Typical operating weight | Typical general-purpose bucket capacity | Typical bucket width | Hydraulic and fit checks | Good starting applications |
| Micro / mini | 1–3 t | 0.02–0.10 m³ | 200–450 mm | Match the pin diameter, pin spacing, and dipper width. A standard digging bucket normally does not require auxiliary hydraulic flow. | Landscaping, utility trenches, and confined sites |
| Compact | 3–6 t | 0.08–0.25 m³ | 300–600 mm | Check coupler compatibility and bucket weight against the machine’s approved attachment and lift-capacity guidance. | Residential construction and general trenching |
| Small | 6–10 t | 0.20–0.45 m³ | 450–750 mm | Confirm bucket mass, linkage geometry, and coupler rating. For a powered attachment, verify required flow and pressure against the machine’s specifications. | Roadside work, drainage, and small site excavation |
| Medium | 10–20 t | 0.40–0.90 m³ | 600–1,000 mm | Use the machine’s approved bucket range; a larger or heavier bucket can reduce usable lift capacity and increase cycle load. Check hydraulic specifications for powered tools. | General construction, foundations, and bulk earthmoving |
| Large | 20–35 t | 0.80–1.60 m³ | 900–1,300 mm | Check attachment weight, coupler capacity, pin dimensions, and machine lift charts. Auxiliary tools must stay within rated hydraulic flow and pressure. | Large building sites, quarry support, and road projects |
| Heavy | 35–50 t | 1.50–2.50 m³ | 1,200–1,600 mm | Select only within the machine’s attachment and lift limits. Verify the exact hydraulic circuit requirements for any powered bucket or other hydraulic attachment. | High-volume excavation and heavy earthmoving |
Capacity and width ranges are typical examples, not universal limits. Bucket capacity depends on bucket shape and rating method, while suitable capacity also depends on material density, digging conditions, and machine configuration. Always confirm operating weight, attachment compatibility, lift capacity, and hydraulic flow and pressure requirements in the excavator and attachment specifications.
Compare Bucket Capacity Using SAE J296 Heaped and Struck Ratings
An excavator bucket’s capacity is often listed as both struck and heaped. The struck rating measures material level with the bucket’s defined top edges. The heaped rating includes material piled above that level, using the profile specified by the measurement method. SAE J296 provides a consistent basis for comparing these volumes. Check that competing figures use the same standard. Otherwise, the numbers may look comparable when they are not.
Look at both ratings, not just the larger heaped figure. A bucket listed at 1.0 cubic metre heaped may have a noticeably smaller struck capacity. That matters when estimating loads that will not form a neat mound, such as wet clay. Loose soil may heap differently. Real material is rarely so tidy. Also compare bucket width, tooth arrangement, and the excavator’s operating limits. A large capacity is not automatically a productive choice if the machine cannot handle the loaded bucket comfortably. I would treat published volume as a starting point, then check it against the material and work conditions.
Slightly inconvenient, perhaps, but more useful than choosing by one impressive number.
Match Bucket Size to Material Fill Factors, Typically 60–110%
Choosing a bucket by machine capacity alone can leave you hauling air or overloading the excavator. Match bucket size to the material’s fill factor: a planning range of 60–110% reflects how actual payload differs from rated bucket volume. Published equipment-estimating references, including Peurifoy et al.’s Construction Planning, Equipment, and Methods, emphasize adjusting production estimates for material and operating conditions. Loose, free-flowing soil may approach the upper end; sticky clay or coarse, irregular rock can fill unevenly and stay well below it.
Picture a 1.0 m³ bucket. At 60% fill, it carries about 0.6 m³ per pass; at 110%, it carries about 1.1 m³. These are volume estimates, not weight limits. Check material density and the excavator’s rated lifting capacity before choosing a larger bucket. A bucket that looks efficient in dry gravel may slow the cycle in wet clay. That mismatch is easy to underestimate.
Tips: Track several real passes with the intended material. Note spill, bucket heaping, cycle time, and machine stability. If the bucket repeatedly comes up short, a smaller bucket may improve control and keep the machine working smoothly. Recheck after conditions change; even a good estimate can miss.
Select General-Purpose, Heavy-Duty, or Rock Buckets by Abrasion
Excavator bucket choice should match the material’s abrasiveness, not just its name. General-purpose buckets suit soil, clay, and sand, where abrasion and impact are usually moderate. Their standard cutting edges and wear surfaces keep the bucket versatile without adding unnecessary weight. If the material contains sharp gravel, however, a general-purpose bucket may wear faster than expected.
For mixed, abrasive ground, a heavy-duty bucket offers thicker wear plates and stronger edge protection. It can handle compacted soil, gravel, and occasional rock, but extra steel adds weight. Check the machine’s rated capacity before choosing a heavier option. A small trial helps. Record the material, operating hours, and wear near the cutting edge; appearance alone can mislead.
Rock buckets are built for highly abrasive, high-impact work, such as loading blasted rock. Reinforced side cutters, durable adapters, and protective wear components help resist damage from sharp fragments. They are not automatically the best choice for every rough job. On softer ground, their weight and narrower design may reduce efficiency. Inspect teeth, welds, and pin connections regularly. Even careful records can miss uneven wear, so compare both sides of the bucket during routine checks.
How to Choose the Right Excavator Bucket
Compare general-purpose, heavy-duty, and rock buckets by the abrasiveness of the material.
General-purpose buckets suit low-abrasion work, while heavy-duty and rock buckets are better suited to increasingly abrasive conditions. Scores are a qualitative selection guide, not standardized test results; actual wear depends on material, bucket design, and ground-engaging tools.
Check Bucket Width, Pin Spacing, and Coupler Compatibility Against OEM Specs
Choosing the right excavator bucket starts with fit, not appearance. Compare bucket width, pin diameter, pin spacing, and coupler type with the OEM specifications for your machine and attachment. Measure pin spacing from center to center. Measuring from outer edges can give a misleading result. A few millimeters may matter, depending on the mounting system.
Match bucket width to the work area and ground conditions. A narrow bucket can make clean passes in a tight trench, while a wider one moves more soil but may face greater resistance in dense ground. Check that the pins fit correctly and the coupler locks fully. Never assume compatibility just because the pins slide in. Wear can change the fit, too. Specs matter, but the parts in front of you deserve a careful inspection.
Tips: Keep the OEM measurements beside your field notes. Check for worn pins, uneven gaps, or unexpected movement after coupling. If a measurement seems close but not exact, pause and verify it rather than forcing the fit.

